Skip to content

2017

The Fun of Coding a Discord Bot

Hello, everyone! Today's post is all to do with my Discord Bot and how I made it. If you haven't already joined my Discord Server, a) You Should and b) you won't have seen my Bot.

On the server, I have made a bot which can do a few fun things and fills in for my friend David. For example, typing /xkcd would show you the latest xkcd comic. You can also update Davvo's game and eventually, I will be adding a /weather module for him. Now for a little guide on creating your own bot:

Step 1: Setting Up

First of all, I will assume that you have a basic level of JS knowledge, and that you know how to use Discord.

When creating a bot on Discord, you need to do a few things. First of all you have to create a bot user, which you can do here. You'll want to go ahead and create a new app. You'll want to give it a name like Super Bot and give it an icon, much like a user profile icon. Once you've done that, go ahead and finish creating your bot.

You'll then see a page like this with lots of useful information: 
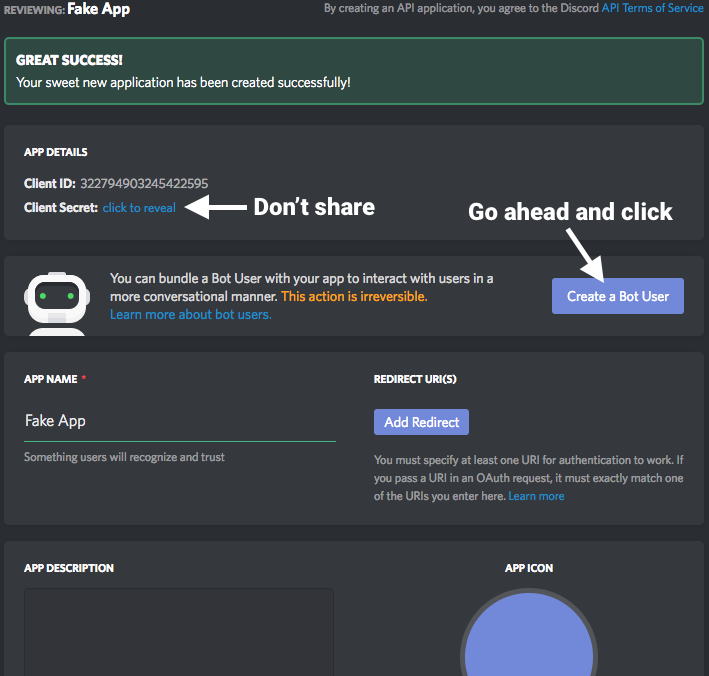
Go ahead and click Create a Bot User and then copy the token.

After that, you'll need to invite the bot to your server by hand, using this URL (replacing CLIENT_ID with your ID). https://discordapp.com/oauth2/authorize?client_id=CLIENT_ID&scope=bot&permissions=1341643969. Then add the bot to your server and you're good to go.

Now that you have a Bot setup on the website, you can go ahead and start your text editor and a terminal window.

First, create a folder for your bot where you can store all of your code and then cd into your bot's directory (e.g. cd ~/Coding/Discord Bot). From there, you'll want to type npm init to create your node package. Just hit enter through all prompts.

After that, you'll need to grab the Discord.js module by doing npm install discord.js --save to get the package and save it to package.json. After that, we can create our files.

Create 2 files, 1 called settings.json and one called index.js. We'll be putting all of the tokens etc in the JSON file and all of the functionality in the JS file.

in your settings.json, add the following:

{
  "discord_token":"PUT YOUR TOKEN HERE",
  "status":"Following a Tutorial"
}
After you're done with that, save the file and open up index.js where you can copy and paste this code:
const Discord = require("discord.js");
const client = new Discord.Client();
const settings = require("./settings.json");

client.on("ready", () => {
  console.log("Staring Bot...");
  client.user.setGame(settings.status);
});

client.on("message", message => {
  // We'll put some stuff here later...
  return;
});

client.login(settings.discord_token);
Once that's all done, you'll have a Discord bot that does... well... nothing... (yet).

Step 2: Adding Functionality

So, it's all well and good that you now have a working bot, but it doesn't do anything! In this section we'll cover some basic things you can do with your bot (you might want to open this to help you).

First of all, a ping. Where the code currently returns in the client.on("message"...)

Next, we want to add a response, so, for example, when the message is equal to "ping", we'll want to send "pong".

This can be setup fairly easily with the usage of messsage.content = "ping" in an if statement. We then use the message.reply() method to reply and the result we get will look something like this:-

client.on("message", message => {
  if(message.content === "ping") {
  // Checks to see if the message content is "ping"
    message.reply("pong");
    // Replies to the user with "pong".
  };
});

Step 3: Virtually Infinite

The previous section just covers 1 basic bit of functionality and the possibilities are virtually infinite. For example, you can add a dice roller fairly easily, by using the following code:-

function getRandomInt(min, max) {
// A function to get a random integer...
  return Math.floor(Math.random() * (max - min + 1)) + min;
}

if(message.content === "/roll") {
// Checks for a "roll" command
  message.channel.send(getRandomInt(1, 6));
}

I also coded an xkcd command to get the latest xkcd and display it nicely (you'll need another node module called requestify which you can get by using the command npm install --save requestify):-

const requestify = require('requestify');
// Imports the node module.

if(message.content === "/xkcd") {
  requestify.get('https://xkcd.com/info.0.json').then(function(response) {
  // Gets the latest XKCD in a JSON format.
    var pr = response.getBody();
    // Gets the body of the response and parses it as JSON.
    const embed = new Discord.RichEmbed();
      embed.setTitle(pr.safe_title);
      embed.setDescription(pr.alt);
      embed.setFooter('This XKCD was brought to you by Davvo', 'http://charliebritton.me/IMG_0057.JPG');
      embed.setColor([255, 0, 0]);
      embed.setImage(pr.img);

    message.channel.send({embed});

  });

}

Conclusion

Thanks for reading my blog post on how to create a Discord bot. I hope you found it useful and informative. If you have any questions, Tweet me @charliebrittdev or have a look at the official discord.js site.

Update

I've noticed that I haven't been posting to the site much for a while which disappoints me because the whole idea of this site was to allow people to easily see what I was up to and this hasn't been happening as I have liked. Since my last post about EURO 2 (which is here on YouTube), I have been up to a lot of things which I will briefly outline below.

  • I have made a lot of progress coding wise and I have made a perfectly functional Discord bot which I now use on my discord server and I am working to improve it and get it into full time use.
  • I have also been on a couple of holidays, which again can be found on my YouTube channel including a mini road trip around Somerset and Devon and a week long holiday with my dad's side of the family.
  • As I am writing this post, I am trying to think of things that I can post and do for the blog but I will be adding many more things soon.

EURO 2 - Days 3 & 4

In the morning of the Tuesday, we woke up to a broken hard drive :( which was not good at all. We were very chilly in the morning and so it was a welcome surprise when the sun came out. We spent the morning at the campsite and did some droning before we set off on a short journey to a place which was about an hour south of Cléuger.

We drove around for about an hour rejecting various campsites and aires before we arrived at an almost abandoned campsite (we were literally the only people there)! We then walked down to the beach which was less that 1km from the site and had a swim in the very cold sea.

After we were settled in at the site, we cooked up some 'Lentielles' and 'Coq au Vin' for dinner. We then got into bed for another reasonably cold evening.

On day 4 (a Tuesday), we woke up very cold and prepared for the journey to Jonzac (near where 'Bampi' lives). We stopped at Guérande City where we had galettes and bought some salt before we continued our journey for the long haul.

Finally, we arrived at Bampi's house where we had a very lovely spaghetti bolognese and a nice bed to sleep in for the night. That concludes days 3 and 4 of our #Euro2 road trip and I will be updating you for days 5 and 6 soon.

EURO 2 - Days 1 & 2

So on friday night (7th April), my dad, my brother and I embarked on a journey of a lifetime. (Just kidding).

We set off on friday at about 5pm, ready to get to the port of newhaven for 11. We had McDonalds and prepared for the 3 hours of sleep which we'd be lucky to get on the ferry. At around 4 in the morning, we got off the ferry and drove for about an hour to a small Aire in the middle of nowhere where we managed to get another couple of hours sleep.

Once the sun had risen and the day was upon us, we set off on a very boring 8 hour journey to a small village called Landénevaac. We got very bored of the travels throughout the day and vowed to travel for only a few hours the next day.

At Landénevaac, we couldn't find an open campsite so we decided to park in a little spot right by the sea. We had cassoulet for supper before getting a well earned night of rest. In the morning, we went for a walk along the seafront and came across a 'feather tree' which we thought was rather amusing.

We set off for a much shorter journey on the Sunday where we looked for a campsite and got some supplies from the local E.Leclerc. In the afternoon, we arrived at the campsite which was right by the sea and had a lovely view but was unfortunately a bit windy.

For dinner in the evening, we collected some lovely fresh oysters, of which there was a plentiful supply, and had some confit duck for our main meal. Then I edited the vlog before we went to bed and had a hot chocolate.

That was days (0), 1 & 2 of the trip. I hope you enjoyed reading it and will be reading the rest of the posts about our road trip.

Hacksoton

Welcome to my post on Hacksoton! Today I will be giving you a summary of what I got up to at the Southampton coding event.

To start things off, we arrived promptly at 9:30 when the doors were due to open and were welcomed by all of the organisers who gave us our name badges and food cards. The food cards were completely free and could be exchanged for a bacon & egg roll (breakfast), a sandwich, some crisps and some fruit. Dinner was burritos (chicken, beef or veggie) which were all very tasty.

What did I get up to?

During the eight hours, I had a go at creating a reusable template for CHILLDNB and Chill Acoustic. I used an app called Sketch to design the website (as pictured below) and then used their mirror app to test it out on a phone/tablet. After I had finished that, I got to work by downloading Jekyll and using a very minimal template. I started figuring out the arrangement of the html and once i'd done the hero section (the bit at the top), I began to set out the various styles for the css.

What else happened?

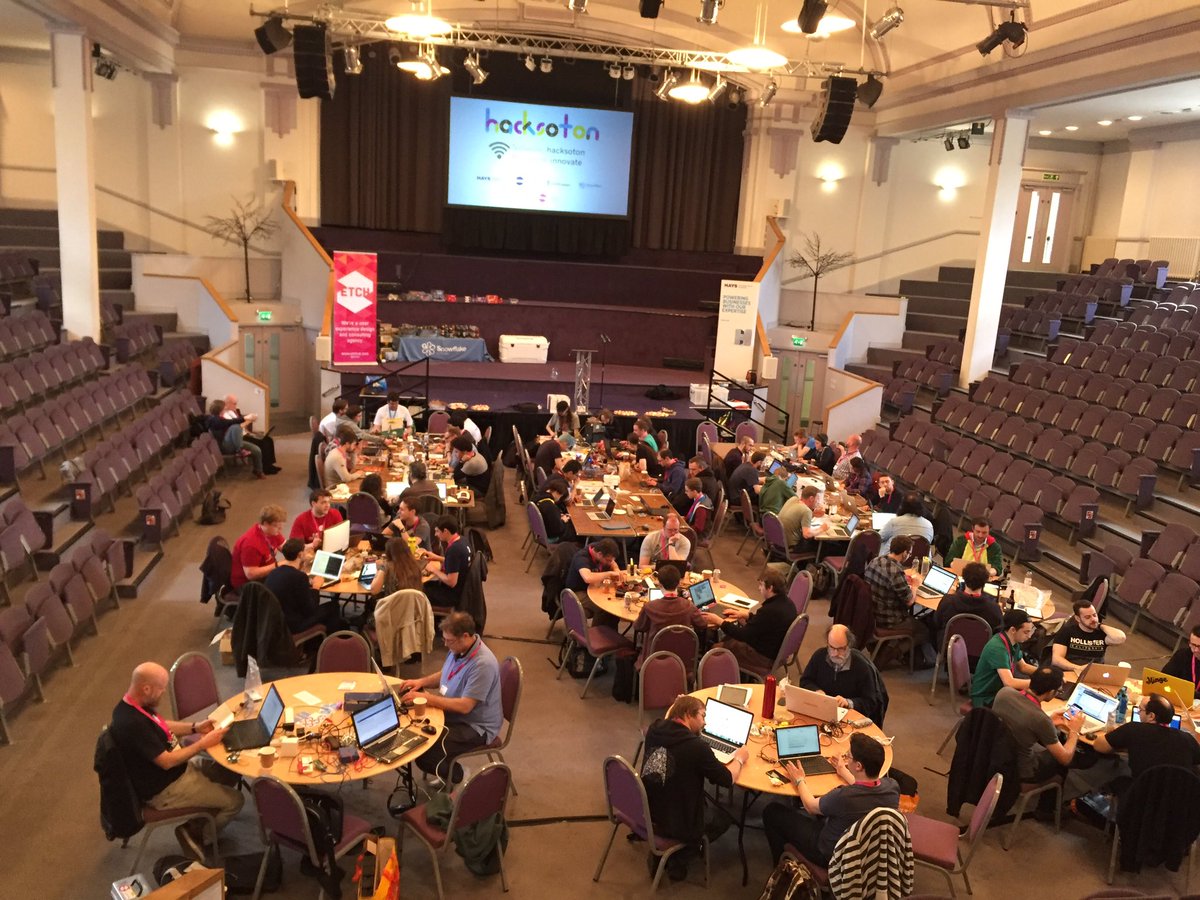
During the day, there was a kids area where they were doing some simpler projects & a presentation on modern javascript (which you can find here). At the end, there were presentations on what people got up to at the event, such as a fish that responds to music, something to make breakfast orders easier and a 'dinosaur vision' VR project.

They also gave away some Amazon Echo Dots and there was even an easter egg hunt which was pretty cool. There was refreshments and assistance available all day from many amazing developers. I'd like to say a huge thanks to all of the various sponsors/organisers (especially Etch).

Overall it was an amazing day which was super fun to be at (I will be coming back next year) but if there was one ever so slight criticism (it's not really even a criticism) I could make, it would be that it would be nice to see a page where I could check out all of the code and projects made at Hacksoton on webpage or github repo somewhere.

Happy birthday to Adam and thank you for checking out my post!

Creating a Successful Online Radio Station

In today's post I am going to be explaining just how to make an online radio station.

Naming & Website

The first thing I did was to pick a genre for my station. For example, I like chillout music and drum and bass. i had a quick search on YouTube and I found some tracks that I liked to listen to. I then went on to ovh.co.uk and had a look at a domain for my station. I had decided to call my station 'Just Chill DnB' and I thought I could get the domain justchilldnb.com, then I tried to cut down on the characters in the domain and eventually got chilldnb.com. After that, I registered the domain for a year, which set me back £8 (~$10).

Station Server

The next thing that i did was rent a small VPS from OVH so that I could host my website and Radio Automation Software.

I opted for a £3 (~$4) VPS which is by far the best deal I have found in terms of computing power/price. The £3 VPS has 2GB ram, a 10GB SSD, and 1 'vCore' which is adequate for a light bit of web hosting and radio. I used Centos 6 and once I'd bought my VPS, I changed my SSH settings to only accept connections from port 22 to port XYZ to stop basic brute force attacks, disabled root login and setup public key authentication.

After that, I created the account chill-dnb for the radio automation software and nginx web server. I then installed VNC on my VPS so that I could configure the radio automation software. Installing nginx was easy, as I followed a lovely DigitalOcean tutorial which got me all setup for serving the web content. I used the Virtual Hosts to allow me to serve multiple websites for if I decided to create another radio station in the future. I then put my website placeholder on the VPS and pointed my website to the IP of my VPS and that was replaced with a proper website later on.

As for the radio automation, I'd opted for an old piece of software made to run on Windows XP and I used wine to allow me to run it on Linux. I then built up a library of royalty free songs that I liked and copied them over to my VPS using FTP, which DigitalOcean made another good tutorial on. After that, I recorded some Idents (20-30 is good) and also uploaded them. I made some advert songs to keep SHOUTcast happy and built an automatic playlist so that I didnt have to pick out songs every day, then I made sure that it streamed properly and did what I wanted it to do.

Making it Public

I went onto the SHOUTcast website and clicked 'Broadcast Now' and chose their hosted version (meaning I didn't have to worry about bandwidth), where i input my details and my logo. I then had a good old long listen to the station to make sure that I was happy with it, before I added it to TuneIn (this got me so many more listeners)! Finally, I created a Facebook page and setup a Twitter account. Since then, I have peaked at around 35 concurrent listeners without really touching the station and I could easily improve this by running giveaways and being more active on social media. If you have the time and are willing to do this, checkout the links at the bottom.

Conclusion

Making an online radio station can be a fun and thrilling project, for a total cost of £44 (~$55), and can help develop Linux knowledge (I know that I am much better working in the command line and with Linux now) and can be really great if you are wanting to get into computers and play around with web development and coding. Thank you for taking the time to read this post and enjoy the rest of your day :-)

Edit (30/10/17): I have had my first paycheck!

Links: * Successful Brand Building Process, * Ten Ways to Build a Brand for Your Small Business * Google Search